Instructions for creating FanPage and adding FanPage to the business management (BM)
Writing date: 2023-11-07 12:33:11
How to Create a Fanpage in Facebook Business Manager
Illustrating images

Step 1: Access Business Manager
- Begin by logging into your Facebook Business Manager account at business.facebook.com.
Step 2: Navigate to the Pages Section
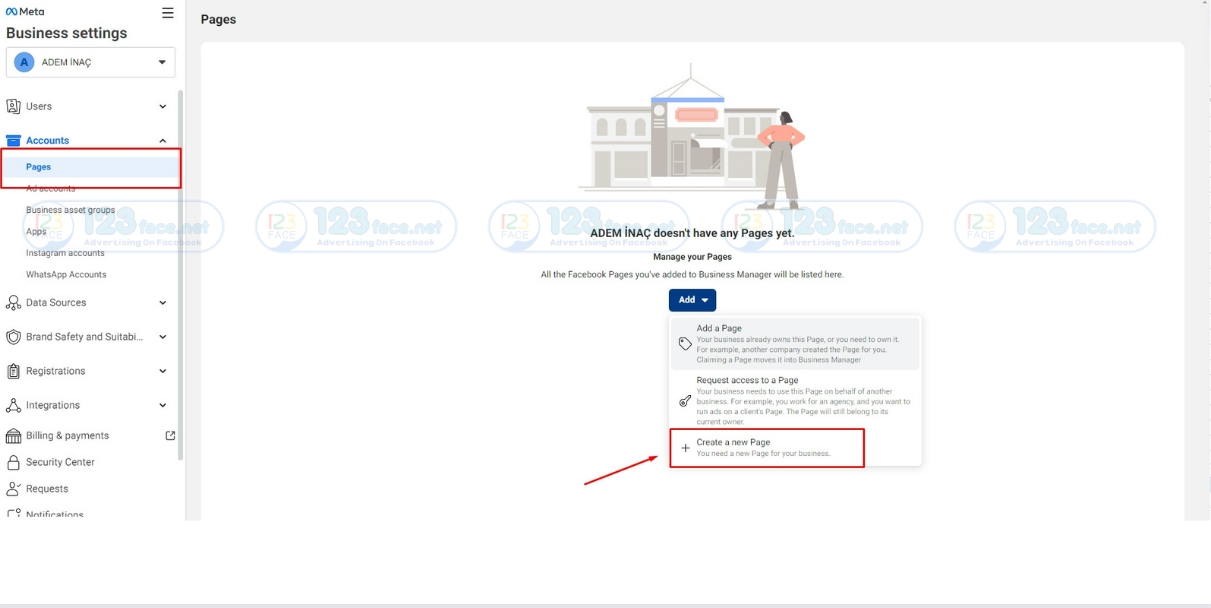
- In the Business Manager dashboard, find the 'Pages' section under the 'Accounts' menu.
Step 3: Start the Creation Process
- Click the 'Add' button and select 'Create a New Page.' This option is perfect for businesses looking to launch their Facebook presence.
Step 4: Choose Your Page Category
- Select the category that best fits your business to help potential customers understand what your business is about.
Step 5: Fill in Basic Information
- Input your business name and follow the prompts to add other essential details like your address and contact information.
Step 6: Customize Your Fanpage
- Upload a profile picture and cover photo that align with your branding. Complete all relevant sections to provide visitors with useful information about your business.
Step 7: Publish Your Page
- Once you've finalized the details and are satisfied with how your page looks, hit 'Publish' to make it live.
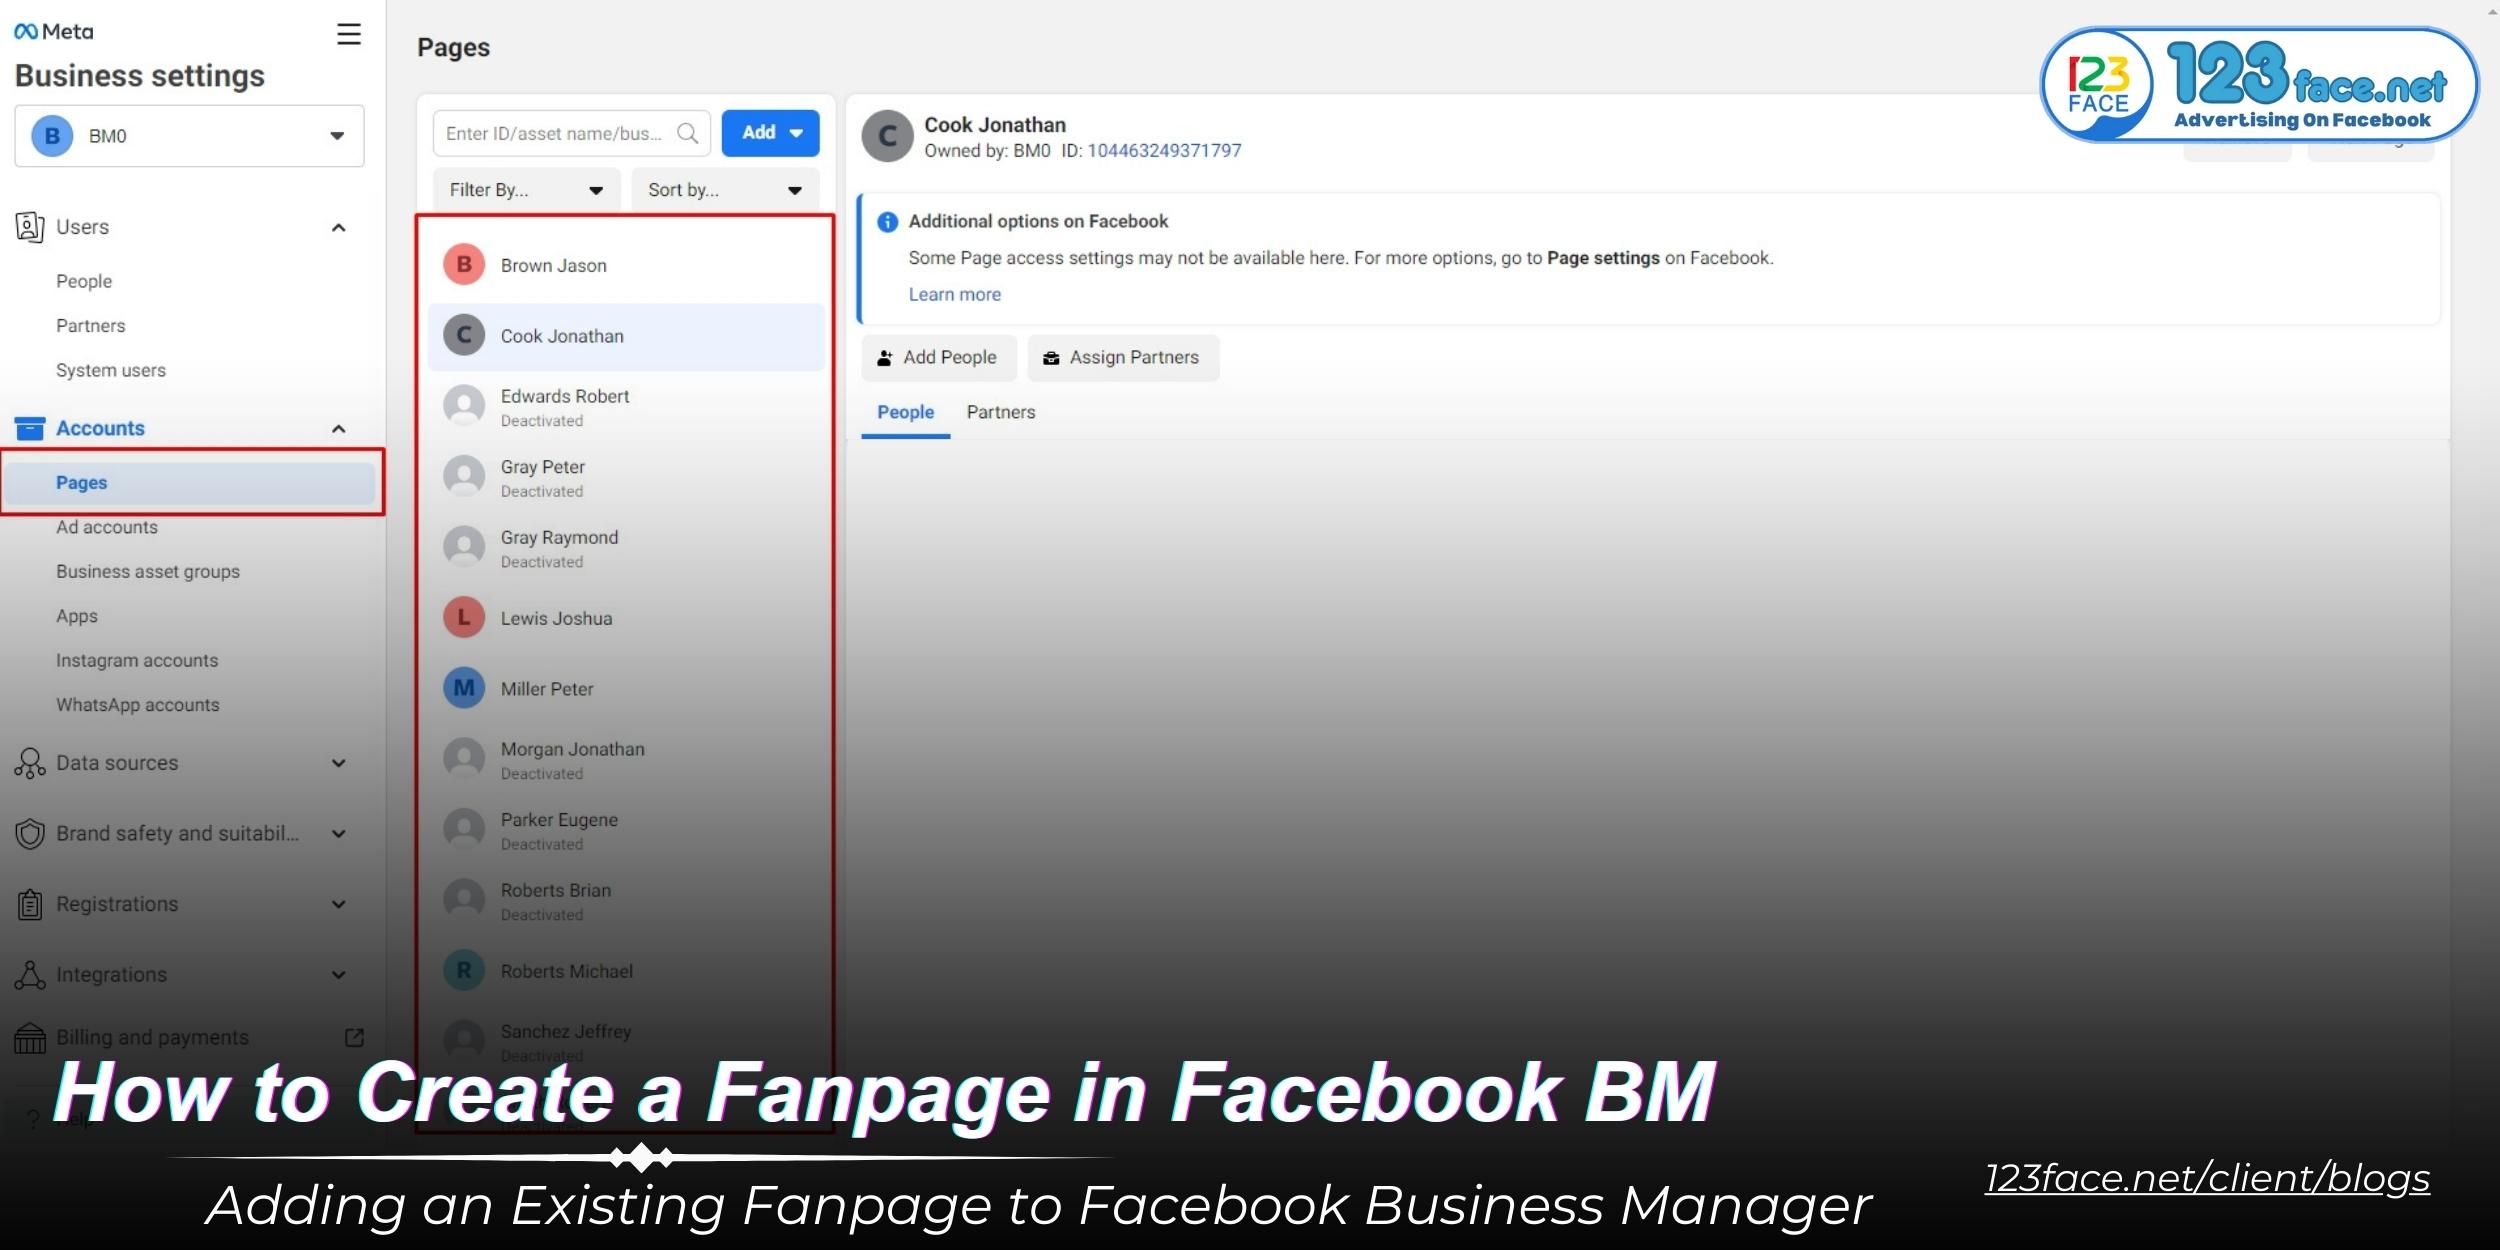
Adding an Existing Fanpage to Facebook Business Manager
Illustrating images
Step 1: Prepare Your Fanpage
- Ensure you have admin rights to the Fanpage you wish to add.
Step 2: Access Your Business Settings
- In Business Manager, click on 'Business Settings' at the top right of the page.
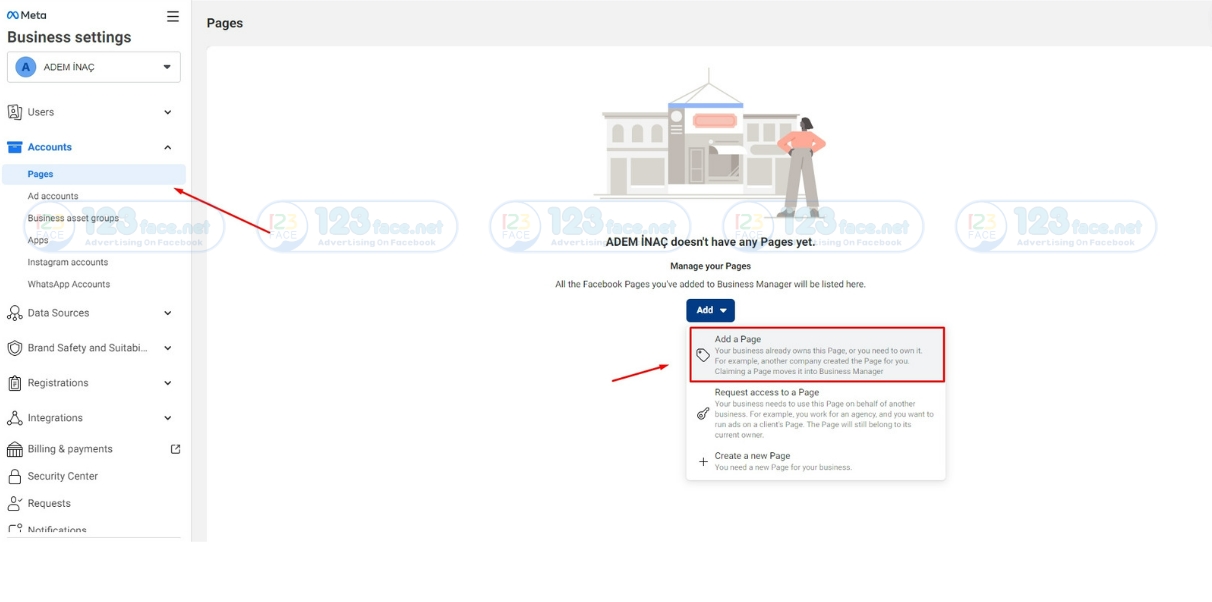
Step 3: Add the Fanpage to Your Business Manager
- Under the 'Accounts' tab and 'Pages' section, click on 'Add' and then 'Add a Page.' Enter the name or URL of your existing Fanpage.
Step 4: Confirm the Addition
- After entering the details, click 'Add Page.' You may need to verify your request with additional authentication.
Add fanpage moderators in business manager
Step 1: Log Into Facebook Business Manager
- Begin by logging into your Business Manager account at business.facebook.com.
Step 2: Access Your Business Settings
- Click on the 'Business Settings' icon, which is typically found in the upper right corner of the Business Manager dashboard.
Step 3: Navigate to Your Fanpages
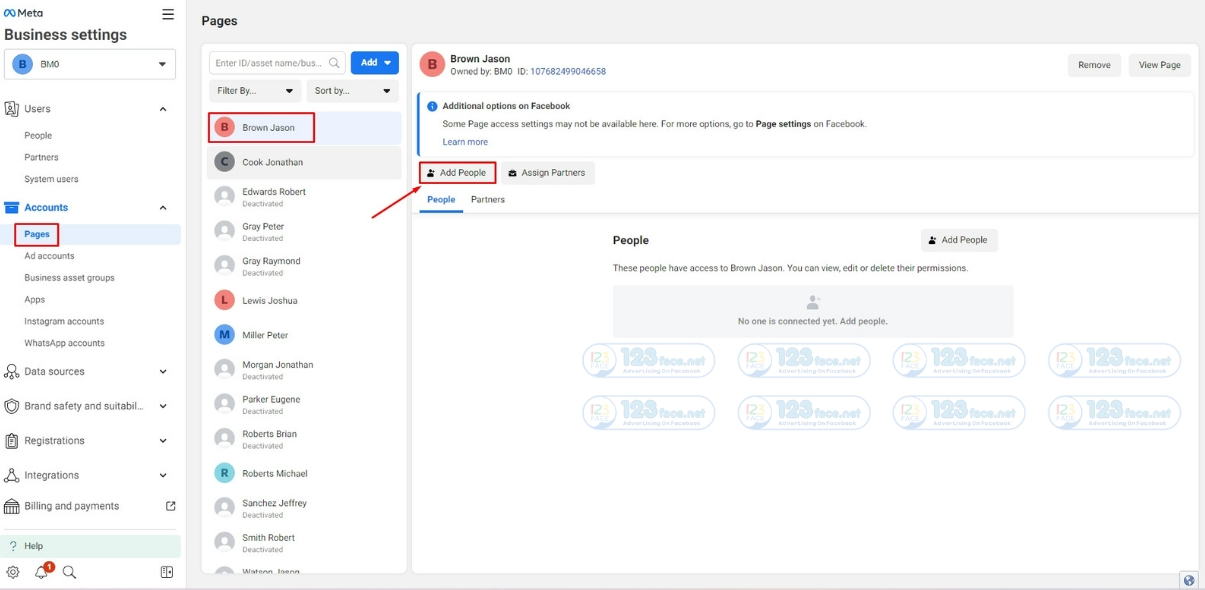
- Within Business Settings, look for 'Accounts' and then click on 'Pages' to view all the Fanpages associated with your Business Manager.
Step 4: Select the Fanpage
- Choose the Fanpage to which you want to add an admin. If you haven't added your Fanpage to the Business Manager yet, you'll need to do that first by clicking on 'Add' and then 'Add a Page.'
Step 5: Add a New Admin
- With the desired Fanpage selected, click on 'Add People.' Here, you can enter the email address associated with the Facebook account of the person you wish to add as an Admin.
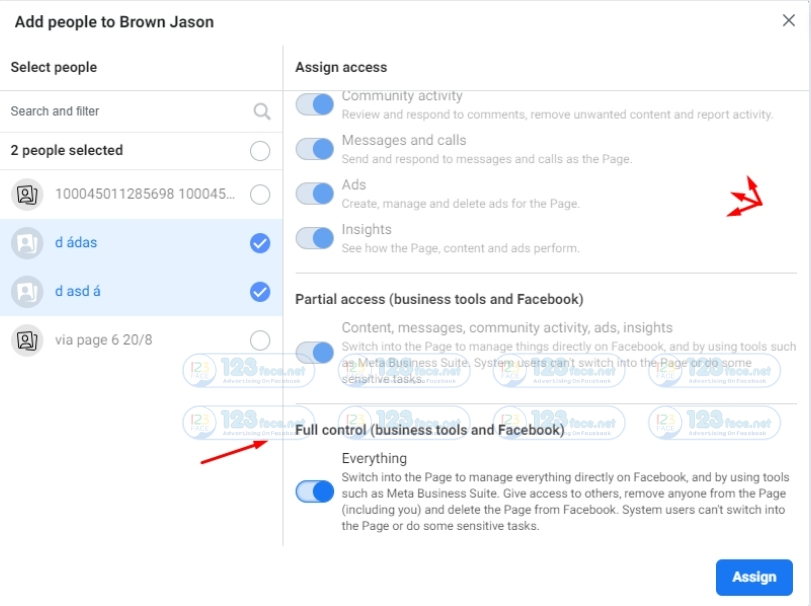
Step 6: Assign the Admin Role
- Once you've selected the person, you will be able to assign them a role. Check the box next to 'Admin.' Remember, Admins have the highest level of access, so they can manage all aspects of the Page, including sending messages, publishing as the Page, responding to and deleting comments, creating ads, and viewing insights.
Best Practices When Adding an Admin
Choose Wisely
- Admin roles should only be given to trusted individuals, as they have the ability to make significant changes to the Fanpage.
Understand Role Responsibilities
- Make sure the person you're adding understands their responsibilities as an Admin and is familiar with your social media policies.
Review Permissions Regularly
- Periodically review the list of people who have access to your Fanpage to ensure all admins are current and that their roles still align with their duties.
Thank You For Accompanying 123face.net
Buy cheap Facebook advertising accounts, business Facebook accounts, 250 USD, 350 USD and Nolimit accounts at the world's #1 reputable website https://123face.net/